Drops under the roof, soggy cardboard boxes, and a water stain near a door don't necessarily have the same cause. Before adding ventilation or a moisture absorber, check whether water is getting in from outside, coming in with the goods, or condensing on a cold surface. The fix depends on the cause.
If you're already using the container, first protect any sensitive goods and note your observations the same way each time you check. Before buying, describe the goods, how long you'll store them, and how you'll use the container. A container advertised as watertight won't necessarily stay dry inside, no matter what you load or what the weather is like. A container for this type of storage: Container 20 ft Standard · Used · last trip · Beige.
Distinguishing leaks, condensation, and moisture brought in
A leak is water getting in through a defect in the walls, roof, seals, or a joint. A stain after rain, a damaged seal, or a suspicious repair gives you clues to check, but doesn't prove the cause. Condensation forms when water vapor turns to liquid on a surface that's cold enough. It can show up on the roof, walls, or the goods themselves.
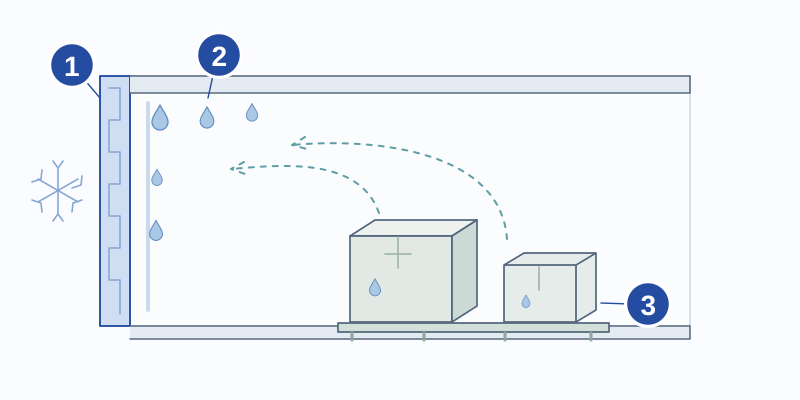
Visual reference
- Cold surface
- Possible condensation
- Moisture introduced
Illustrative diagram, not to scale.
Water can also be brought in with pallets, wood, packaging, or wet equipment. A wet floor, items brought in during rain, or recent cleaning changes things. Several causes can happen at once: fixing a seal doesn't remove moisture that's already there, and putting in an absorber doesn't fix a leak.
| Observation | What to check | Mistake to avoid |
|---|---|---|
| Stain near a seal after rain | Condition of the seal, how it closes, and possible path of the water | Concluding it's condensation without checking for a leak |
| Drops spread over a cold wall | Temperature, humidity, and what happened before | Assuming a watertight container always stays dry inside |
| Moisture appearing after loading | Condition of goods, pallets and packaging brought in | Treating only the air without examining what brings in water |
| Traces behind objects or in a corner | Access for inspection, condition of the area and air circulation | Masking the trace with a covering before understanding its cause |
Record signs of moisture, the weather and the storage conditions
Mark a few spots on a sketch: door, middle, back and where sensitive goods sit. Photograph the same points before changing the layout. Note when traces appear, their size and how they change. A single photo won't tell you if the problem comes back often, appears after loading, or depends on a particular time.
If you use sensors, record temperature and relative humidity at the same time. Place them according to their instructions: a reading on a wet surface doesn't describe the whole interior. Comparing inside and outside can help, but relative humidity percentages can't be compared on their own if temperatures differ. You may need a professional or suitable monitoring equipment to understand the readings.
- Date and time of the reading.
- Rain, temperature change or other weather event observed.
- Temperature and humidity, with sensor locations.
- Door openings and cleaning operations.
- Goods or packaging added and possible wet condition.
- Places where traces appear, shown on the photos and plan.
- Action taken and date, so you can track its effect.
Avoid letting water in before adding devices
Inspect what goes into storage. Separate items that are still damp and find a suitable place to dry them, rather than relying on the closed container to dry them. Check packaging, supports, and protective materials that can hold water. A material treated for another purpose is not necessarily dry.
Arrange goods so you can inspect sensitive areas. Don't permanently hide seals, walls, or marks you've already noticed. You need to be able to look at and move items without damaging the container. For sensitive goods, ask about the product's storage conditions and the protection needed for its packaging.
Check if outside air can help with drying
Ventilation can remove water vapor, but it also lets in outside air. If that air brings more moisture, opening more doesn't necessarily improve things. To choose ventilation, consider the climate, contents, and opening times. The container's length alone isn't enough.
First check that existing vents are not blocked by objects, linings or poor maintenance. Before adding equipment, have a professional check its location, fixing, airflow, and the risks of water entry or other safety problems. The number and diameter of openings used on another project are not a general rule.
Compare solutions with their constraints
Solutions don't all work the same way. Are you trying to remove water from the air, avoid contact with a cold surface, or protect specific packaging? Also check the power supply needed, maintenance, water collection, and how to monitor the result.
The container's volume alone isn't enough to choose the capacity of an absorber or device. You also need to know the storage period, moisture added, openings, and conditions around the container. For insulation or a covering, have the joints between materials and any moisture that could stay hidden studied. Covering a damp wall doesn't fix the cause.
| Action | What the action can do | To plan before choosing |
|---|---|---|
| Ventilation | Renew air under suitable conditions | Outside conditions, circulation, rain, and safety |
| Desiccant or absorber | Retain a limited amount of moisture | Sizing, replacement, fixing and management of absorbed moisture |
| Electric dehumidification | Remove water from the air within a given operating range | Power supply, drainage, operating range and maintenance |
| Insulation or dedicated protection of goods | Manage heat transfer or protect the stored goods | Wall design, interfaces and monitoring of hidden areas |
| Repair a leak | Correct an identified water entry | Location of the defect and verification after intervention |
Check the effect of each change
Note the starting situation, what you change, and what you'll observe to check the result. Keep readings and photos in the same spots. If the goods stay protected, changing just one thing at a time helps you understand what works. Not seeing drops during one visit doesn't prove the problem is fixed in all conditions.
Check after the events that used to trigger the problem: rain, loading, a long period with the doors shut, or a temperature change. If signs of moisture persist or the goods need controlled storage conditions, have a suitable solution set up. Have mold, unusual odors, or damaged goods examined; don't hide them behind a new covering.
Information to send to the supplier
Include the container reference, photos of any marks, and your readings. Describe the goods, packaging, how long they will be stored, how often the container is opened, and what electricity is available. Mention any equipment already fitted and work already done. That way the supplier can understand what you need from an anti-humidity product.
Ask for a quote that states the solution, its capacity, its operating limits, and the checks to plan for. Before buying, separately check the container's watertightness and how the inside storage is arranged. Have the supplier specify the accessories and services for the container and site you have chosen. A catalogue picture or name does not guarantee the temperature and humidity conditions.
Checklist to keep near the container
- Water entry and condensation examined separately.
- Photos of the marks, linked to locations on the plan.
- Moisture inputs and loading events noted.
- Temperature and humidity recorded together if sensors are used.
- Sensitive goods protected and inspection areas accessible.
- Existing vents checked.
- Chosen solution with its limits and maintenance.
- Result tracked under the conditions that triggered the problem.
Find the right type of container
Containers to compare
Models in stock. Indicative prices exclude tax, transport, and unloading. The images show the models: ask for recent photos of the container you are buying.
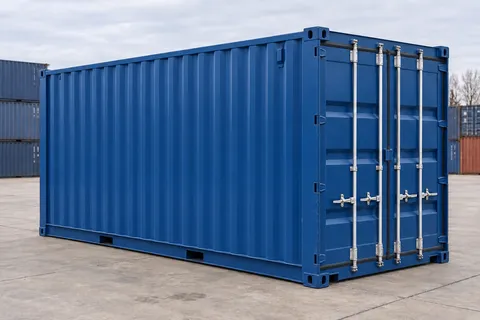
CA-20-STANDARD-NEW-BLUE
Container 20 ft Standard · New · one trip · Blue
New · one trip / Blue
$3,075Indicative, excl. tax
Request an offer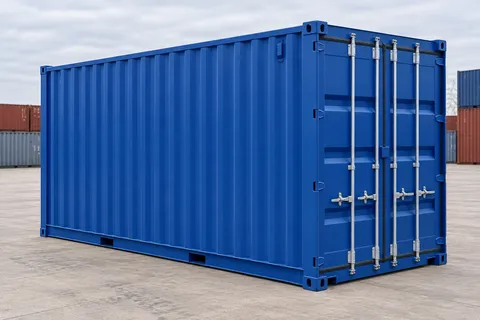
CA-20-HIGH-CUBE-NEW-BLUE
Container 20 ft High Cube · New · one trip · Blue
New · one trip / Blue
$3,997.5Indicative, excl. tax
Request an offer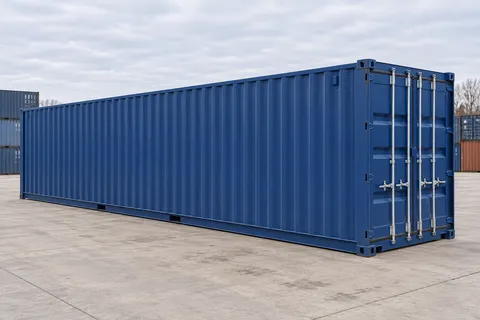
CA-40-STANDARD-NEW-BLUE
Container 40 ft Standard · New · one trip · Blue
New · one trip / Blue
$4,428Indicative, excl. tax
Request an offerPractical questions
Can a watertight container have condensation?
Yes. Moisture can be in the air, packaging, or goods. Keeping rain out does not guarantee the inside will stay dry.
Should vents always be added?
No. You need to look at moisture inputs and outside conditions. Ventilation can help in some situations and bring moisture in others; it must be chosen to suit the context.
How many moisture absorbers does a 20- or 40-foot container need?
Size alone is not enough to answer. The quantity depends on the moisture brought in, the storage period, and how you use the container. Follow the instructions from the manufacturer of the product you choose, and have someone check that they suit your storage.
Technical references
- Virginia Tech — How to Prevent Moisture in Sea Containers
Moisture from packaging and pallets, condensation, ventilation, and moisture absorbers. This document does not give a dose that works for every container.